- Knowledge Base
- Posting
- How to Successfully Post to Multiple Facebook Groups
Article sections
This article will be focusing on guiding you to successfully create and post to your groups. We’ll be taking the posting procedures one step at a time with screenshots so that even beginners can easily follow without stress.
We believe that you have successfully created a FB Auto Tool account and you have done the necessary basic setups like adding a facebook account and also authenticated apps for sending posts.
Preparing Your account
The first step in making a post is to prepare your account first. Make sure your Timezone has been set to avoid having different time as the server. Set your Posting Settings, decide if you want only your open groups to display, set if you want your post and links to have Unique ids (Recommended). Read our article on preparing your account to fully understand it.
Preparing your Facebook Groups (Sorting Your Groups by Category)
It is recommended to sort your groups by category so you can easily know what to post to each category. This is not mandatory but if you want to achieve the best result in posting to multiple Facebook, then it is highly recommended.
Preparing your Post
Facebook have have four different post types, Message, Link, Image and Video. We have designed our system to be able to also post these four post types. In this article, we’ll be using the Link post type for demostration.
How to Post to Multiple Facebook Groups
[dt_quote type=”blockquote” font_size=”big” animation=”none” background=”plain”]Posting is done from the app homepage. So go to Home from the main menu[/dt_quote]
1. Select your Groups: Scroll down from the home page and select the groups you wish to post. (If you have created a category, select the category from the drop down).

2. Create your post: After selecting all the facebook groups you want to post, scroll up now to create your post. Select your post type (Message, Link, Image, Video). In this case we’ll be selecting Image.

Now fill the post boxes as shown in the screenshot above. A preview will be displayed in the right hand side of your screen to see how it’ll be displayed on facebook.
3. Posting/Scheduling: To post instantly, Simply set your post interval and click the send now button. Relax and watch your post being posted to the groups with the intervals set.

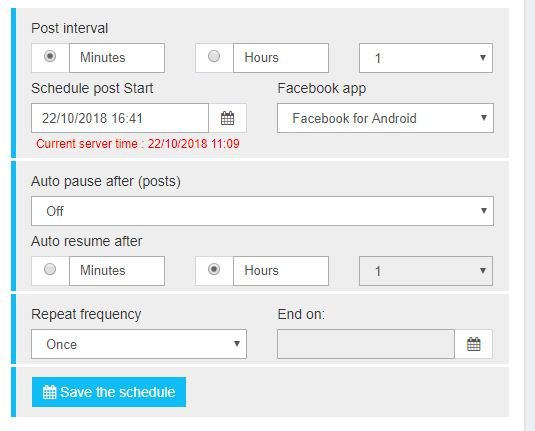
For Scheduling: To schedule posts for later time while you are away. You do NOT have to use the Send now option, instead, click on Scheduled Posts additional fields are opened automatically which you can fill like in the image below,

Note: You must Save a post first before before you can schedule.
To view your scheduled posts, go to Posts from the main menu and click on Scheduled Posts.

Related Articles
